
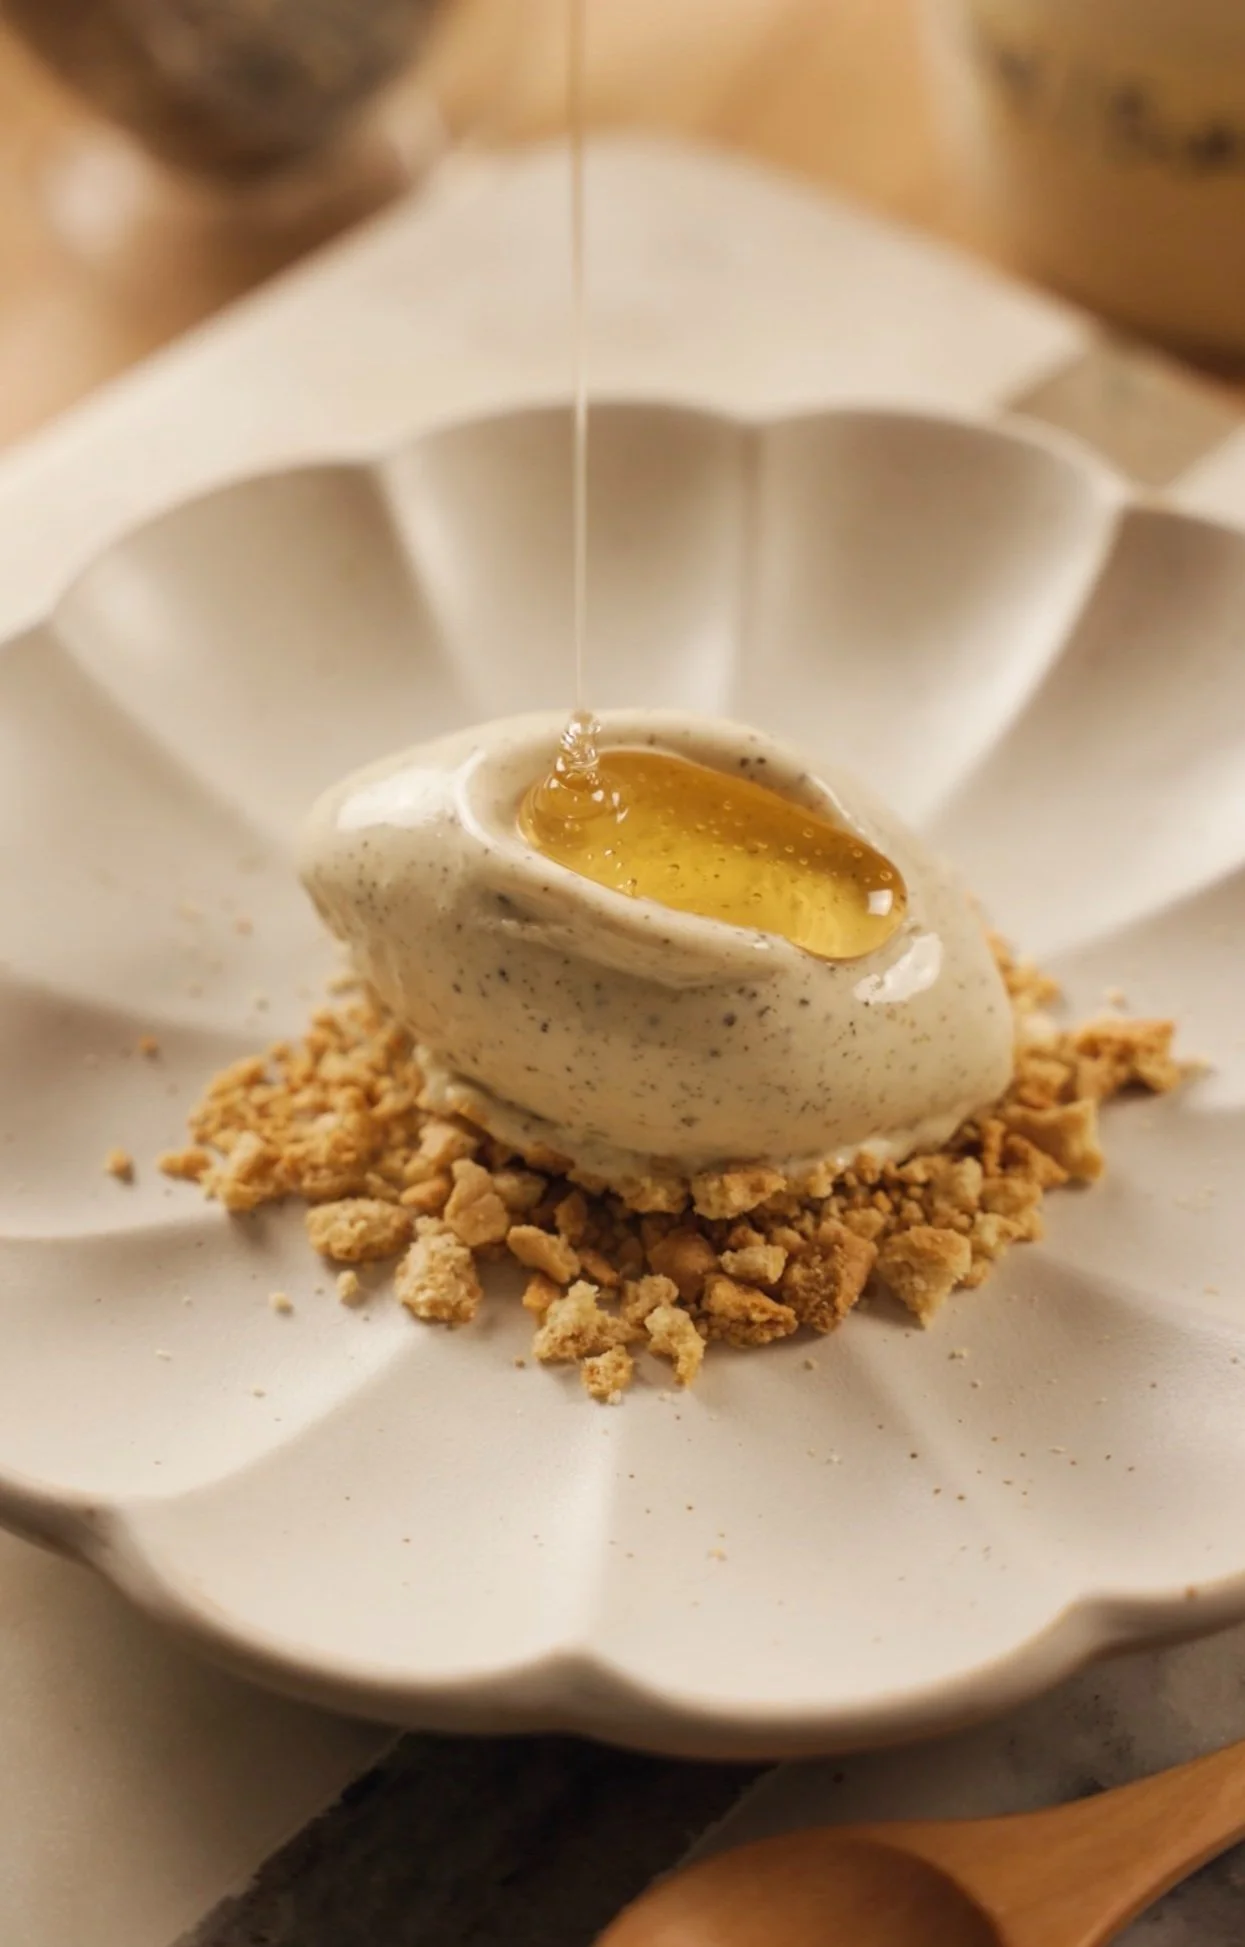
Double Jasmine & Burnt Honey Rice-Cream
For the past week and a half I’ve made ice cream nearly every single day. Dozens of scoops were had in the attempt to make this recipe.
This is my Double Jasmine & Burnt Honey Rice-Cream.
Am I sick of it (r)ice cream yet? No, not even close.
If you want to read about the process of making this flavour I wrote about it on my (*Paid*) Substack!


Jasmine is one of my favourite floral flavours—and I wanted TWO of them. (Here is what Wikipedia has to say!)
Jasmine Tea: tea scented with the aroma of jasmine blossoms. Jasmine tea can have any base as the tea base; however, green, white tea and black tea are more common.
Jasmine Rice: is a long-grain variety of fragrant rice. Its fragrance is reminiscent of pandan
NOW, if you have ever tried to cook with these flavours, you would understand that they can be quite delicate! I wanted both of the Jasmine flavours to be present, so I decided to opt for a egg-less ice cream base.
Let’s make it!
Notes before you start:
Yes, this can be made in a Ninja Creami. I used a Cuisinart 1.5 Quart Ice Cream Maker.
I don’t recommend this as a no-churn recipe!
This recipe is eggless, but it involves xanthan gum. This is the thickening agent and stabilizer which prevents it from getting too hard once stored in the freezer. Use a precise scale as a little goes a long way! I don’t recommend omitting.
Recipe:
Special Equipment:
Ice Cream Maker
Coffee Grinder
Cheesecloth
0.1g Kitchen Scale
Double Jasmine
& Burnt Honey Rice-Cream:
250g Heavy Cream
400g 2% Milk
60g skim milk powder
50g granulated sugar
0.8g xanthan gum
1g salt
20g Jasmine Rice, toasted & ground
10g Jasmine Tea, ground
75g Honey
Prepare your ice cream maker by freezing the double insulated freezer bowl for 24 hours. If using a Ninja Creami, skip ahead.


In a pan, add your dry Jasmine rice. Place the pan over medium heat and toast for 5-8 minutes or until golden and fragrant. Shake the pan often to prevent it from burning. Once toasted, remove from the heat and pour the rice into a coffee grinder. Blitz until a powder forms. Transfer to a small bowl and set aside.
Next, measure out your Jasmine tea leaves. Add them to your coffee grinder and blitz until a fine powder forms. If you don’t have a coffee grinder, a mortar and pestle can be used!


In a small bowl, add your skim milk powder, sugar, and xanthan gum (make sure it is measured out precisely) stir to disperse the xanthan gum into the powder. This prevents clumping when we add it to the liquid!


In a medium sauce-pot, add your heavy cream, milk, skim milk powder mixture, the ground toasted rice and the tea leaves. Place the pot over low heat and bring to a gentle simmer. Simmer for 10 minutes to steep the tea leaves and infuse the milk with the Jasmine flavours. Stirring frequently to help dissolve the sugar and prevent the milk from scalding.
After 10 minutes, remove the pot from the heat and allow it to cool while you prepare the burnt honey.


Add the honey to a small saucepan. Place over medium heat. The honey will start to bubble and foam. Do not stir! Swirl the pan to evenly caramelize the honey. About 2-3 minutes. When it becomes dark amber in colour and smells toasty, remove it from the heat.
Pour the honey slowly into the pot with the milk. Lastly, add the salt. Whisk to incorporate fully.
Pour the ice cream base through a fine sieve or cheesecloth into a clean bowl, to get rid of any large grains of rice or tea leaves. Discard what remains in the sieve. Allow the ice cream base to cool.


If using an ice cream maker: Cover the bowl with plastic wrap so that it is touching the surface of the custard (this is so it doesn’t form a skin/film).
Let the flavours infuse for 5-6 hours in the fridge.
If using Ninja Creami: Transfer the sieved custard to your respective pint containers. This recipe should make enough for two pints.
Freeze them for 24 hours before spinning! Let the flavours infuse for 5-6 hours in the fridge.
Once the base has had time to cool, you can churn it!


If using an Ice Cream Maker: Once the custard is cold you can churn it with your prepared ice cream basin. Pour the base into the ice cream drum and churn according to your ice cream makers instructions. I churned mine for 20 minutes, until it was thick and smooth.
If using a Ninja Creami: Spin the ice cream 2-3 times on the Ice Cream setting. When done, it should be thick and smooth.
Transfer to a container and store in the freezer, or eat right away! Once kept in the freezer— to enjoy at original consistency—remove from the freezer 5-10 minutes before serving.


I like to serve it with crushed Digestive Cookies or Graham Crackers, and a drizzle of honey.
If you make this recipe leave me a comment below or send a picture on Instagram (@eboake)! Enjoy!